
Last Updated: July 2026
Three winter nail looks, each with its own steps: a solid icy blue mani, a metallic silver mani, and hand-painted snowflakes. All three use polish you likely already own, plus a fine liner brush for the snowflakes.
Quick Answer
Icy blue, silver, and snowflake nails are three distinct winter nail looks you can do with regular polish and basic tools. Icy blue and silver are solid-color manicures, each about 20 to 25 minutes. Snowflakes are hand-painted over a white or blue base, closer to 40 minutes for two accent nails.
Key Takeaways
- Icy blue and silver are both solid-color looks. Snowflakes are hand-painted line work over a base color.
- Icy blue takes about 20 minutes. Silver takes about 25. Snowflakes take about 40 for two accent nails, not a full set of ten.
- Metallic silver polish shows brush strokes more than cream polish does. Thin coats fix this.
- The snowflake pattern is six lines from one center point, not a complicated stencil.
- Dehydrating with alcohol before polish is the step that prevents early lifting on all three designs.
Best For
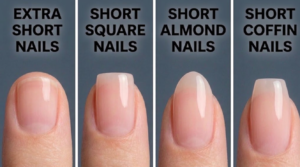
- Nail length: short, square, and almond all hold these three designs well. Snowflake detail reads cleanest on medium-to-long nails, but works fine small.
- Skill level: icy blue and silver are beginner looks. Snowflakes take a steadier hand, plan on your first one looking a little uneven.
- Season: winter through early spring.
- Occasion: everyday wear for icy blue or silver. Snowflakes read more holiday-specific.
- Tools: base coat, topcoat, your polish colors, a fine liner brush for the snowflakes. A dotting tool is optional.
Design 1: Icy Blue
Result. A clean, pale blue glossy nail with a soft shimmer that catches light without looking busy.
Reality. Blue polish needs two coats to go opaque without streaking. The first coat looks patchy. That’s normal, not a mistake.
Repeat.
- Push back cuticles and buff the shine off the nail plate. Two minutes.
- Wipe each nail with rubbing alcohol. One minute.
- Apply a thin base coat and let it dry fully. Five minutes.
- Paint one thin coat of icy blue polish. Let it dry most of the way before the second coat, about five minutes.
- Apply a second thin coat for full opacity. Five minutes.
- Clean up any polish on the skin with a small brush dipped in remover. Two minutes.
- Seal with topcoat, capping the free edge. Five minutes.
Total time the first time: about 20 minutes.
If the color looks patchy near the cuticle, polish pooled there. Wipe excess off your brush before painting that section next time.
Design 2: Silver
Result. A solid metallic silver nail, glossy and reflective, no glitter involved.
Reality. Metallic polish shows every brush stroke if the coat goes on too thick. This is the one design here where thin actually matters more than usual.
Repeat.
- Push back cuticles and buff the shine off the nail plate. Two minutes.
- Wipe each nail with rubbing alcohol. One minute.
- Apply a thin base coat and let it dry fully. Five minutes.
- Paint one thin coat of metallic silver polish, brushing in one direction only. Let dry about five minutes.
- Apply a second thin coat, same direction. Five minutes.
- Clean up any polish on the skin. Two minutes.
- Seal with topcoat, capping the free edge. Five minutes.
Total time the first time: about 25 minutes.
If the silver looks streaky or brushstroke-y, the coat went on too thick or you changed brush direction mid-nail. Reload less polish and paint one direction only.
Chrome upgrade, gel only: if you’re working in gel, cure a no-wipe gel topcoat, rub on chrome powder with a silicone tool, then seal with a second no-wipe topcoat and cure again. This needs an LED lamp. Regular polish will not take chrome powder the same way.
Design 3: Snowflake
Result. A hand-painted snowflake on one or two accent nails, white or blue base underneath.
Reality. Your first snowflake will look a little lopsided. Do the accent nail last, after your hand has warmed up on the other four. That alone fixes most of the wobble.
Repeat.
- Prep and wipe with alcohol, same as above. Three minutes.
- Apply base coat, then two coats of your base color. Let dry fully. Fifteen minutes.
- Dip a fine liner brush in white or silver polish. If it’s too thick to move smoothly, thin it with one drop of polish thinner or remover.
- Paint one straight line down the center of the nail, base to tip. One minute per nail.
- Cross it with one horizontal line at the midpoint. One minute per nail.
- Add two diagonal lines through the same center point, so six lines radiate out from one spot. Two minutes per nail.
- Add a short branch or dot off each of the six points. Three minutes per nail.
- Let the design dry fully before topcoat. At least five minutes.
- Seal with topcoat, capping the free edge. Five minutes.
Total time the first time: about 40 minutes for two accent nails.
Do the snowflake on one or two nails, not all ten. Ten hand-painted snowflakes is a different time commitment, and most people don’t finish the tenth one as clean as the first.
If the lines wobble, your brush had too much polish loaded. Wipe most of it off on a paper towel before you start each line.
Working Across Formats
- Gel: cure each layer, base coat included, before adding the next. Skipping a cure step is the most common reason color or line work lifts early.
- Acrylic or hard gel extensions: same design steps, applied over the cured overlay instead of the natural nail.
- Press-on: paint the design on a flat press-on off the hand, let it cure or dry fully, then glue it on. Easier to control the liner work off-hand than on it.
- Matte finish: swap the glossy topcoat for matte on the icy blue or silver design. Skip matte on the snowflake nail, it mutes the fine line detail.
Mistakes to Avoid
- Skipping the alcohol wipe. This is the step most people skip, and the reason polish lifts within a few days regardless of which design you’re doing.
- Painting a second coat before the first dries. This drags color and muddies the line work on the snowflake in particular.
- Loading too much polish on the liner brush. Covered above, but it’s the single biggest snowflake fix.
- Doing all ten nails in one design. Especially for snowflakes. Pick one or two accent nails and let the rest carry a solid color.
FAQs
What’s the difference between the icy blue and silver designs? Icy blue is a pale blue polish. Silver is a metallic polish. Both are solid-color, no line work involved.
How long does the snowflake design take? About 40 minutes for two accent nails. A full set of ten would take considerably longer.
Do I need a special brush for snowflakes? A fine liner brush works best. A regular polish brush is too wide for clean lines.
Can I do these on short nails? Yes. Icy blue and silver both hold well on short nails. Snowflake detail works fine small, it just reads more delicate.
Why does my metallic silver look streaky? The coat went on too thick, or the brush direction changed mid-nail. Thin coats, one direction, fixes it.
Do these need gel or a lamp? No. All three work with regular polish. Gel is covered separately for anyone working in that system.