
Key Takeaways: Press-on Tools and Prep
- Most lifting has a specific cause. An edge lift usually means oil. A full lift usually means a skipped buffing step.
- Adhesive choice sets your wear time. Tabs last one to three days and can be reused. Glue lasts up to two weeks and can’t.
- Raised cuticles, shine, and natural oil are the three things standing between your nail and the glue.
Press-on tools and prep are what decide if a set holds for two weeks or lifts by Wednesday. The glue matters less than what happens before it touches your nail.
A full acrylic set at a salon runs about $100, mostly for the prep work a tech does before any product goes on. Getting your own nails ready right takes about five minutes and gets you most of the way to that same result.
Most press-on complaints trace back to one of four things: the wrong adhesive for the wear time, skin in the way of the glue, the wrong tools on hand, or a nail surface that’s too smooth or too long. Here’s everything that goes into press-on tools and prep, covered one piece at a time.
Nail Glue vs. Adhesive Tabs: How Long Each One Lasts
Nail glue and adhesive tabs are the two ways you attach a press-on to your real nail. Glue is a liquid adhesive that dries hard and bonds the press-on to your nail plate. Tabs are small double-sided sticky pads you press between the two instead of using liquid at all.
Which one you pick decides how long your set lasts and how much work it takes to remove.
Nail glue makes a strong, tight bond built for longer wear, usually up to two weeks. Adhesive tabs are sticky pads built for short wear, usually one to three days. Tabs come off clean and go back on. Dried glue is hard to reuse the same way.
The trade-off runs both directions. Glue holds through showers, dishes, and a full workweek, but taking it off means a real removal process, not a peel. Tabs skip that entirely. You pop the set off at the end of the night and the same nails go back on next weekend if they’re still in good shape.
| Feature | Adhesive Tabs | Nail Glue |
| How long it lasts | 1 to 3 days | Up to 2 weeks |
| Best for | A weekend event or one night out | Everyday wear, showers, washing dishes |
| Reuse | Peel off and use again | Hard to reuse once it dries |
| Removal | Peels off with no soak | Needs acetone or gentle filing |
How to Prep Your Cuticles Before Press-On Nails
Cuticle prep means pushing the skin around your nail back before you glue anything down. It’s the step people skip most, and it’s the one that decides whether a press-on lies flat or sits on top of raised skin.
Press-on nails are stiff plastic. If the skin around your cuticle is raised, the nail sits on top of that skin instead of flat on your nail bed, and it lifts fast.
Pushing that skin back is a small step that decides how the whole set looks and how long it stays on.
Why Cuticle Prep Helps Press-Ons Hold
- The nail lies flatter, so it looks like it’s growing out of your finger instead of sitting on top of it.
- Glue sticks to your nail plate, not to skin. Pushing the skin back gives the glue more real nail to hold onto.
How to Push Back Your Cuticles
Use the flat end of your wooden cuticle stick. Gently push the skin toward your knuckle. Don’t dig in, just guide it back.
Do this once, right before you glue. Pushing cuticles back every day dries out the skin around your nail, and that’s a different problem than the one you’re solving here.
If a nail lifts right at the base within the first day, this step usually got skipped.
Press-On Nail Starter Kit: What Comes Inside and What to Add
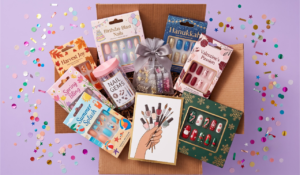
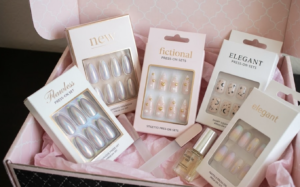
A press-on starter kit is everything you need to size, prep, and glue on a full set in one box. Most kits are built around a single wear method, either glue or tabs, so what’s inside tells you how the set is meant to go on.
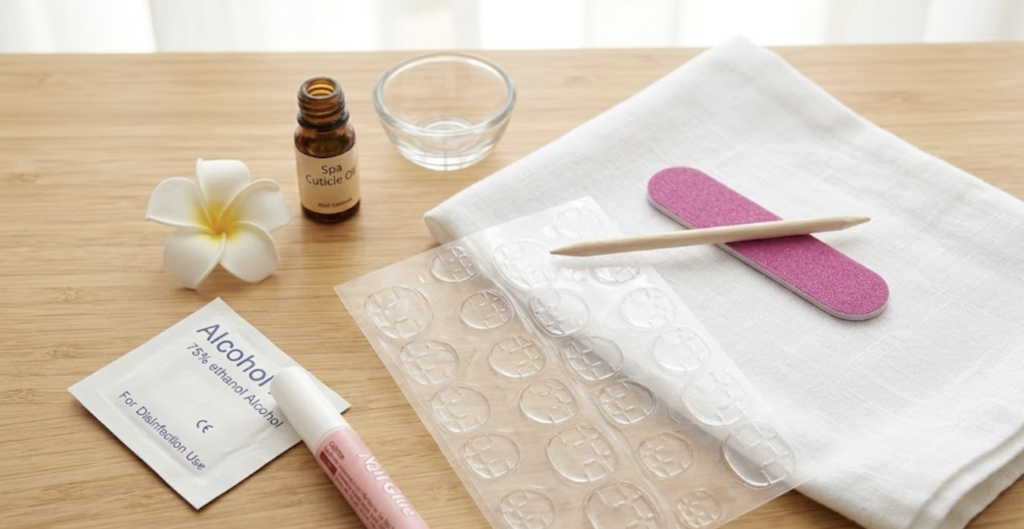
A standard kit comes with nails in a range of sizes, a mini file, a wooden cuticle stick, an alcohol pad, and glue or adhesive tabs. Two more tools help, even though they’re not in the box.
Here’s what’s already there, and what’s worth adding before you start.
What Comes in the Box
- 24 to 30 press-on nails, in different sizes so you can match each finger
- A mini file and a wooden cuticle stick
- An alcohol prep pad
- Press-on glue or adhesive tabs
Kits ship with a range of sizes because your ten nails are not one size. Most hands need at least three different widths across both hands, sometimes more.
Extra Tools That Help Press-Ons Stick
- Nail clippers, so your real nail doesn’t peek out past the edge of the fake one
- A buffer block, to rough up the nail surface so the press-on has something to grip
Neither tool is required to get a set on. Both cut down on the two most common failure points: length showing underneath, and glue that doesn’t grip a shiny nail.
How to File and Shape Your Nails Before Applying Press-Ons
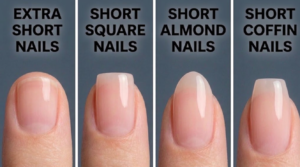
Filing and shaping means trimming your natural nails and roughing up their surface before you apply anything. Press-ons need a short, flat, matte nail underneath to hold onto, or they won’t sit right and won’t stick well.
Here’s what each part of the process does, and why it matters for a press-on set specifically.
Filing: Match the Length
Your real nail needs to be shorter than the press-on. If it’s not, it pokes out past the edge and catches on everything.
File straight across first, then round the corners slightly. You’re not shaping the final look here. The press-on decides the final shape. You’re just clearing room underneath it.
Buffing: Create Grip
A shiny nail is too slick for glue to hold. Buff the surface until the shine is gone. That rough texture gives the glue something to bite into.
A few passes with the coarse side of the buffer block is enough. You’re aiming for a matte finish, not sanding the nail down.
Cleaning: Wipe Away the Oil
Your own nail oil sits on the surface and gets between the glue and the nail. Wipe each nail with the alcohol pad right before you glue. Let it dry for a few seconds first.
If a nail lifts across the whole surface, not just the edge, oil is almost always why. Wipe it again and try that nail once more.
Four pieces, about five minutes total once you get going. Skip any one of them and the glue is working against something, raised skin, shine, or oil. Handle all four and the glue barely has to work at all.
Verdict: Worth the five minutes, every time. The nails don’t know the difference between a $100 salon set and a home set with the same prep. Only the lift does.
FAQs
How long do press-on nails last with glue vs. tabs?
Glue lasts up to two weeks. Tabs last one to three days. Pick glue for everyday wear and tabs for a single event.
Do you need to buff your nails before press-ons?
Yes. A shiny nail is too slick for glue to hold. A few passes with a buffer block gives the glue a rough surface to grip.
What size press-on nails should you buy?
Most kits include a range of sizes because your ten nails aren’t the same width. Expect to use at least three different sizes across both hands.
Can you reuse press-on nails?
Tabs, yes. Peel them off clean and press the same nails back on later. Glue, not really. It dries hard inside the nail and doesn’t come off clean.
Why do press-on nails keep lifting?
It depends on where. Lifting at the edge usually means oil was still on the nail. Lifting across the whole nail usually means the buffing step got skipped.
Wrapping Up
Match your sizes before you start, and grab a buffer if you don’t already have one. Cuticle prep, filing, buffing, and the right adhesive are the whole job. Skip one and the glue is working against you. Handle all four and the set holds the way it’s supposed to.