
At a Glance: Aura Nails Without an Airbrush
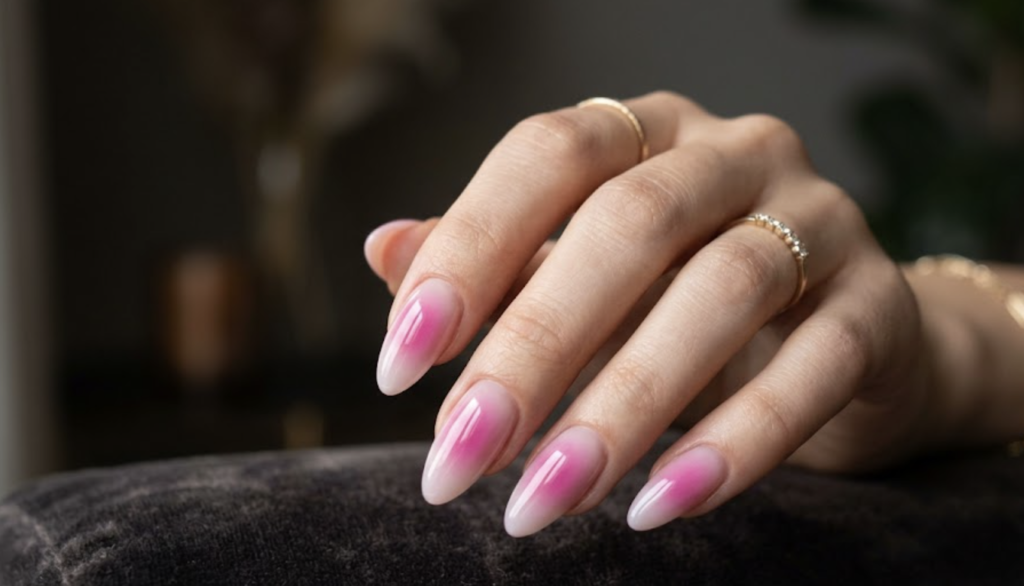
- Aura nails have soft color glow concentrated at the center of the nail that fades outward, mimicking an “energy field” look. It’s one of 2026’s dominant nail trends, and it started as an airbrush technique.
- No airbrush needed. A sponge or small brush blends pigment into a fully matte top coat, that’s the one non-negotiable step the whole effect depends on.
- Almost every failed attempt is due to to skipping the matte coat, overloading pigment too fast, mixing too many colors, or adding art before sealing the aura. The piece is built around fixing those four things.
Aura nails are the soft color glow showing up on every trend list this year. The look started with an airbrush in a salon chair. You can build the same gradient at home with a sponge or a small brush, no machine required.
This piece covers the matte-base method. It shows the exact point where most first attempts go wrong, and two ways to vary the color once you’ve got the base technique down.
You don’t need an airbrush for aura nails. A sponge or a small blending brush moves pigment powder or gel polish into the center of a matte base, then spreads it outward. Two colors keep the gradient clean. A full set takes about twenty minutes once you’ve done the technique once before.
This Works at Any Length, Any Skill Level
This technique doesn’t require a specific nail length, shape, or prior experience to work. Here’s where it fits:
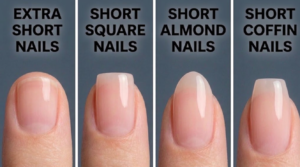
- Nail length: short to medium. Almond gives the gradient the most room, but square and round both hold it fine.
- Skill level: first attempt at gel nail art. No prior experience needed.
- Season: year-round. The trend has held steady through 2026 rather than fading with the season.
- Time: about twenty minutes for a full set, once you’ve done the technique once before.
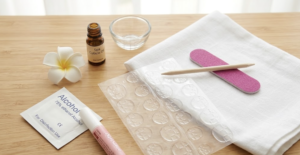
- Tools: gel base coat, matte gel top coat, pigment powder or a matte cream eyeshadow, a small blending brush or a makeup sponge, a UV or LED lamp, alcohol wipes.
What You’ll Need:
This technique skips the airbrush machine on purpose. A salon aura set with airbrush work runs about $70 to $90 depending on the shop. What you actually need is already close to a basic gel kit.
- A gel base coat and a glossy gel top coat
- A matte gel top coat, separate from your glossy one
- Pigment powder made for nails, or a matte cream eyeshadow
- A small angled blending brush, or a makeup sponge as a lower-cost option
- A UV or LED lamp
- Alcohol wipes for prep
Affiliate disclosure: some links on this page may earn NailDesigns.com a commission at no extra cost to you.
How to Do Aura Nails Without an Airbrush
The finished look is a soft color glow centered on each nail, fading out to a clear or milky edge.
Before you get there, there’s a matte base coat, pigment dust on the brush, and usually one nail that needs a second pass to even out. That middle stretch is normal. It’s the technique, not a mistake.
- Prep the nail. Push cuticles back, buff the shine off the plate, and wipe with alcohol. Skipping this step is the reason most gel work lifts early.
- Apply and cure the base color. One or two coats, depending on opacity.
- Apply and cure a matte top coat. This is the step the whole technique depends on. Skip it and the pigment won’t grab.
- Load a small amount of pigment onto your brush or sponge. Tap it into the center of the nail, not the edge.
- Build the color slowly. Add a thin layer, check it from a couple of angles, then add more if it needs it.
- Blend the edges outward until the color fades instead of stopping in a hard line.
- Seal the aura with a clear top coat and cure it. Do this before any other design work.
- Add extra detail, like a rhinestone or a chrome layer, only after the seal coat is cured.
If the Pigment Isn’t Blending
- If it looks patchy or won’t build: the base wasn’t fully matte. Cure a fresh matte layer, then try again.
- If the color looks muddy: too many shades on one nail. Two, not three.
- If the pigment smears once the top coat goes on: the aura wasn’t sealed first. Cure a clear layer over it before adding anything else.
- If the glow looks flat: the pigment went on in one heavy pass instead of a few thin ones.
Aura Variations to Try Next
The base method scales into a few different looks without changing the underlying technique. Here’s where to take it once the fundamentals hold:
- Single-color aura: one shade with a white glow center. The quieter version of the trend, and the one gaining ground in 2026 with people who normally skip nail art.
- Chrome aura: a layer of chrome powder rubbed over the cured aura before the final seal. Reads more dramatic under direct light.
- Two-tone aura: a sunset combination, like pink into orange, or a different primary color on each nail.
- Occasion aura: the same base technique with a small bow or a single rhinestone added after the seal coat.
- Shape notes: almond gives the gradient the most room to spread. Square and round both work, they just need the color placed a little tighter to the center.
Where This Technique Goes Wrong
Almost every failed attempt traces back to one of five things. Check these first before you assume the technique itself isn’t working for you:
- Skip the matte top coat and the pigment sits on the surface instead of blending in. Redo the top coat before trying again.
- Load too much pigment on the first pass and the color comes out patchy. Start with less than you think you need.
- Add nail art before sealing the aura and it wipes the gradient out. Seal first, always.
- Blend three or more colors and the result reads muddy instead of glowing. Stop at two.
- Work over a glossy or under-cured base and the pigment won’t grab at all. Recheck the cure before you blame the technique.
Verdict: skip the airbrush purchase. The sponge and matte top coat combination gets you the same gradient for the cost of what’s likely already in your kit.
Check out this video from Yaliana Enid:
Aura Nails Without an Airbrush: Common Questions
Do I need an airbrush for aura nails?
No. A sponge or a small brush moves the pigment just as well. The technique depends on the matte base underneath, not the tool on top.
Can I use eyeshadow instead of nail pigment?
Yes. A matte cream or pressed eyeshadow works the same way a pigment made for nails does.
How long do aura nails last?
About as long as a standard gel manicure. Plan on two to three weeks before regrowth starts to show.
Do I need tips or extensions, or does this work on natural nails?
Both work. The technique only cares that the base underneath is matte and fully cured.
Why isn’t my pigment blending?
Almost always an under-matte or under-cured base. Recheck the top coat and cure time before adding more pigment.
Can I do this with regular polish instead of gel?
You can, but regular polish dries fast, so you’re racing it while you blend. Gel gives you more working time and is the more forgiving version for a first attempt.