
This holiday season is the perfect opportunity to show off your creativity, and what better way to do it than through your nails? Holiday nail art is all about capturing the joy and warmth of the holidays. Whether you’re planning a glamorous party look or want your nails to reflect winter cheer, these designs will make your fingertips stand out. Your nails can tell a beautiful holiday story from candy cane stripes to gingerbread details.
Sweet Nail Art Ideas to Spark Your Creativity ❄️
Looking for unique and playful nail designs to celebrate the season? From nostalgic gingerbread houses to candy-themed accents, these festive styles will inspire your next holiday manicure.
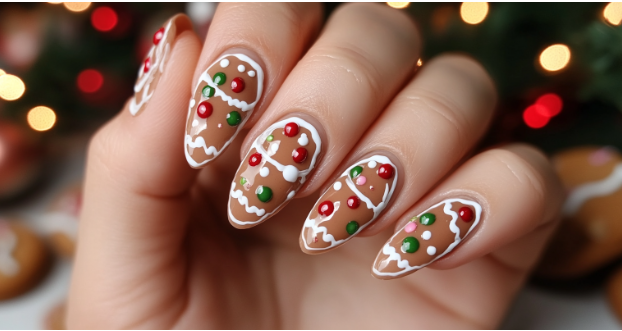
Gingerbread House Magic: Sweet and Whimsical
When thinking about holiday nostalgia, gingerbread houses will always make it to the list. This is what makes gingerbread-inspired nail art a December favorite. After all, it’s fun, creative, and surprisingly simple with the right tools.
- Start with the Base: Apply a caramel or light brown polish. This serves as the “gingerbread” foundation. Ensure it’s smooth and even before moving to the details.
- Add Icing Details: Use a fine nail art brush and white polish to create scalloped edges, zig-zags, or dots resembling frosting. Focus on creating neat lines for a clean finish.
- Incorporate Candy Accents: Bring the design to life by adding small pops of color. Paint red, green, or pink dots to mimic gumdrops or candy buttons. For extra sparkle, try nail art gems for 3D accents.
- Finish with a Topcoat: Seal the design with a matte topcoat for a frosted look. Opt for a glossy finish for a candy-like effect.
For intricate design techniques, check out NAILS Magazine.
Candy Cane Stripes: Classically Bold ❤️
Candy canes are a holiday staple, and their iconic red and white stripes translate perfectly into nail art. This look is bold, festive, and easy to create.
- Begin with a Bright Base: Apply two coats of crisp white or shimmering silver polish to ensure a bright, clean canvas.
- Create Clean Stripes: Once the base is dry, use striping tape or a thin nail art brush to paint diagonal red lines. Alternate between thick and thin stripes for added dimension.
- Add a Modern Twist: To elevate the design, incorporate green glitter stripes or metallic gold accents. These additions give your manicure a unique, festive flair.
- Try Accent Nails: Paint one or two nails in solid red and top with glitter for a coordinated look.
For more creative manicure ideas, visit Allure.
Peppermint Swirls: Playful and Elegant ❄️
Peppermint swirls add a touch of elegance to your holiday manicure. These playful yet sophisticated patterns are ideal for festive gatherings or cozy seasonal moments.
- Start with a Clean Base: Apply a glossy white or pearly polish as your starting layer. Two coats will provide even coverage.
- Draw the Swirls: Use a thin nail art brush to create red spiral patterns radiating from the center of each nail. Work slowly for precision and symmetry.
- Add Sparkle: Enhance the design with glitter or tiny rhinestones at the swirl’s center. This small detail adds a glamorous touch.
- Optional Accent: You can incorporate subtle green or silver lines for extra holiday flair.
Hot Cocoa & Marshmallow Tips: Warm and Comforting ☕
Nothing says cozy quite like a steaming cup of hot cocoa. This comforting vibe can be recreated on your nails for a warm and festive design.
- Choose a Cocoa Shade: Start with a rich chocolate brown or warm mocha polish. A glossy finish works best for this look.
- Add Marshmallow Accents: A dotting tool creates small white dots near the cuticle or tips. These dots mimic floating marshmallows in cocoa.
- Include Glitter: Add fine gold or silver glitter to one or two nails for a shimmering, festive touch.
- Try a French Tip Variation: Paint the tips brown and add tiny white dots for a minimalist marshmallow-dipped effect.
Gumdrop Galaxy: Bright and Whimsical
Gumdrop-inspired nails are colorful, playful, and perfect for anyone who loves bold, candy-themed designs.
- Begin with a Clear Base: Start with a sheer nude or clear polish for a clean foundation.
- Add Candy Colors: Paint dots or abstract shapes in pastel hues like lavender, mint green, coral, and sky blue, as these colors mimic gumdrop candies.
- Apply Texture: To replicate the sugary coating of real gumdrops, use a sugar-texture polish or ultra-fine glitter.
- Finish with Accent Nails: Highlight one or two nails with bold rainbow patterns to make your manicure pop while keeping the rest simple.
Expert Tips for Flawless Holiday Nail Art
Holiday nail art is the perfect way to add a festive touch to your look this season. Whether you’re a beginner or a seasoned pro, these expert tips will help you create stunning designs that last through all your celebrations.
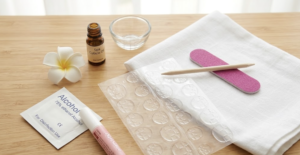
- Use Proper Tools: Dotting tools, striping brushes, and nail art pens ensure clean and detailed designs.
- Seal Every Layer: A topcoat protects your nail art and enhances its appearance. Depending on the desired effect, choose glossy or matte.
- Work with Patience: Let each layer dry completely before adding another to prevent smudging or uneven lines.
- Embrace Decals: Pre-made holiday decals are perfect for intricate designs without the hassle.
- Experiment with Finishes: Combine matte and glitter textures or add rhinestones for extra depth and dimension.
Let Your Nails Sleigh the Season
Holiday nail art is the ultimate way to express the season’s joy. Whether you choose gingerbread houses’ whimsical charm or peppermint swirls’ classic elegance, these designs will add a festive touch to your look. Perfect for parties, your holiday nails can be a shining example of seasonal creativity.
FAQs
1. What is holiday nail art?
Holiday nail art is a fun way to celebrate the season by creating festive designs inspired by holiday themes like candy canes, gingerbread houses, or peppermint swirls. These designs often use holiday colors, glitter, and playful patterns.
2. Can I do holiday nail art at home?
Yes! You can create stunning holiday nail art at home with a little practice and the right tools—like striping brushes, dotting tools, and nail stickers.
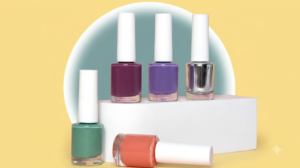
3. What are the best colors for holiday nail art?
The most popular holiday colors include red, green, white, gold, silver, and blue. However, you can also use pastels or neutrals for a modern twist on classic holiday designs.
4. How long does holiday nail art last?
With a good base coat, quality polish, and a durable topcoat, holiday nail art can last 7-14 days. To extend its lifespan, wear gloves when doing chores.
5. Are there easy holiday nail art designs for beginners?
Yes! Simple designs like candy cane stripes, polka dots, or glitter-dipped nails are perfect for beginners. Nail stickers and decals can also simplify the process.
6. What tools do I need for holiday nail art?
Basic tools include:
- Nail polish in festive colors
- Striping brushes for fine lines
- Dotting tools for patterns
- A topcoat for sealing designs
Optional extras include nail decals, gems, or glitter polish.
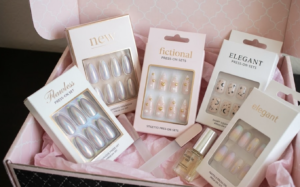
7. Can I use press-on nails for holiday nail art?
Absolutely! Press-on nails with pre-made holiday designs are a quick and easy way to achieve a festive manicure without the effort of freehand art.
8. What’s the best way to remove holiday nail art?
For glitter or textured polishes, use an acetone-based nail polish remover. For stubborn designs, soak your nails in the remover for a few minutes before wiping off.
9. Are holiday nail designs suitable for short nails?
Definitely! All of the designs mentioned—like candy cane stripes or peppermint swirls—can be scaled down for shorter nails.
10. How can I make my holiday nail art stand out?
To make your nail art pop, add 3D embellishments like rhinestones or use textured polishes. Pair matte and glossy finishes for contrast or incorporate glitter for a festive sparkle.