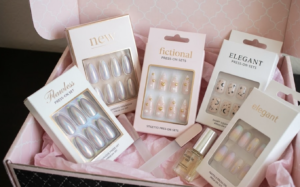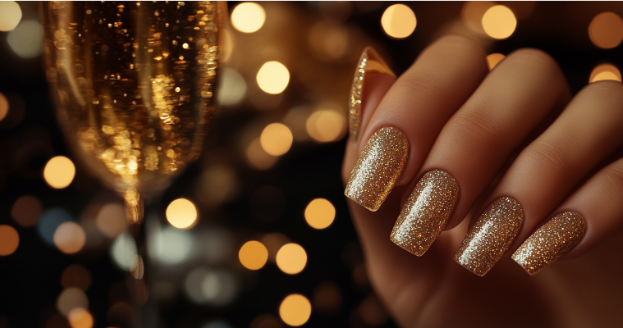

Once the New Year begins, it’s time to shine—literally! Glitter nail designs are the perfect way to infuse your look with brilliance and sophistication. These designs elevate your manicure game and add elegance to every occasion.
In this guide, you’ll discover techniques to layer glitter, creative ways to combine it with matte finishes, and tips for unique placements. Whether you love subtle accents or bold designs, glitter nails will help you sparkle confidently in any light.
Dazzle Your Look with Glitter Nail Designs
Ready to take your nails from ordinary to extraordinary? Glitter nail designs are the ultimate way to add sparkle and sophistication to your manicure. Whether you love bold contrasts, creative textures, or sleek modern placements, this guide contains the inspiration you need to shine.
How to Layer Glitter for Eye-Catching Nail Designs
Layering glitter transforms simple nail polish into a dazzling masterpiece. By building depth and dimension, you can create designs that feel luxurious and unique.
Create a Glitter Sandwich
Layer glitter between sheer polish coats to create a floating effect. Start with a translucent base coat, apply a glitter polish layer, then seal it with another coat of sheer polish. This technique works beautifully with soft hues like pastel pink or milky white.
Design a Glitter Gradient
Use a makeup sponge to dab glitter onto the tips of your nails. Blend the glitter downward for a seamless gradient effect. Mixing fine glitter with chunky pieces ensures the ombré catches the light beautifully. This technique pairs wonderfully with bold base colors like navy or burgundy.
Combine Textures for Added Depth
Pair holographic glitter with metallic flakes or iridescent shards for a bold look. Begin with a fine glitter base, then add larger glitter pieces to build visual interest. Experiment with contrasting colors like silver on deep emerald or gold on black for a striking finish.
Pair Glitter with Matte for Stunning Contrast
Combining glitter with matte polish creates a modern, sophisticated look. This contrast balances softness with sparkle, offering endless design possibilities.
Matte Base with Glitter Tips
Apply a matte base coat in a rich shade like charcoal or wine red. Add glitter to the tips for an updated take on the French manicure. The muted base enhances the brilliance of the glitter, creating a polished, chic effect.
Add Glitter Accents to Matte Nails
Enhance a matte manicure with glitter details on one or two accent nails. Try diagonal glitter lines, geometric shapes, or an ombré effect on selected nails. This approach is perfect for adding a refined sparkle.
Experiment with Color Blocking
Use nail tape to alternate matte and glitter finishes on the same nail. Create diagonal halves, stripes, or checkerboard patterns. Matte black paired with gold glitter offers a luxurious and dramatic look.
Unique Glitter Placements to Set Your Nails Apart
Creative placements can make your glitter nail designs unforgettable. Whether you want bold or subtle sparkle, these ideas will help you stand out.
Reverse Glitter Placement
Flip the classic glitter tip by applying glitter at the cuticle. Use a fine brush to create a crescent-shaped accent at the base of your nail. Pair this with neutral tones for a sleek, modern aesthetic.
Frame Your Nails with Glitter Borders
Outline the edges of your nails with glitter for a sophisticated frame. This design looks elegant with deep base colors like plum or midnight blue. For best results, use a fine detail brush or nail art pen.
Play with Negative Space
Incorporate negative space into your designs for a contemporary vibe. Leave parts of your nail bare while using glitter to create stripes, dots, or geometric shapes. This style is minimalist yet eye-catching.
Check out Elle’s top nail art trends for more placement ideas.
Expert Tips to Keep Your Glitter Nails Perfect
To ensure your glitter nail designs remain flawless, follow these tips:
- Seal with a Strong Topcoat: A high-quality topcoat locks in glitter and prevents chipping.
- Smooth Chunky Glitter: Use two topcoat layers to create a polished finish over textured glitter.
- Simplify Removal: Wrap nails in acetone-soaked cotton pads and foil for 10–15 minutes to remove glitter easily.
Glitter Nail Designs for January Glam
Glitter nail designs are more than just a trend—they express creativity, elegance, and fun. This January, embrace shimmering nails to brighten your winter days. Whether you master layering techniques, pair glitter with matte, or try unique placements, you’ll discover endless ways to reflect your personal style.
Let your nails shine as brightly as your New Year’s resolutions. Experiment with these techniques and share your dazzling results with the world.
FAQs
Q: What type of glitter works best for nail designs?
Fine glitter offers subtle sparkle, while chunky glitter adds boldness. Mixing both creates depth and dimension.
Q: Can I use loose glitter for nail designs?
Yes! Apply loose glitter over a wet base coat or use nail glue for precise designs.
Q: How do I remove glitter nail polish without damaging my nails?
Soak acetone-soaked cotton pads on your nails and wrap them in foil. Wait 10–15 minutes, then slide off the glitter.
Q: Are glitter nail designs suitable for short nails?
Absolutely! Glitter adds dimension, and vertical placements make short nails appear longer.
Q: Can I combine matte and glitter on the same nail?
Yes! Use nail tape to create color-blocked designs or experiment with diagonal patterns.
For more eco-friendly options, explore non-toxic glitter polishes.
Share Your Glitter Nail Creations!
Which glitter nail designs are your favorite? Have you tried layering, matte combinations, or creative placements? Drop your thoughts in the comments below and let us see your glittering creations!