
Key Takeaways
Old money nails succeed or fail on four things, not the polish shade you pick. Here’s what actually separates the look from a basic nude manicure:
- The color is sheer or milky, never opaque. A flat, chalky nude reads cheap. A jelly-thin nude reads expensive.
- The shape is short to medium: almond, oval, or soft square. Length isn’t part of the aesthetic.
- The finish is high-gloss and glass-like. A matte or satin top coat undoes the whole effect.
- Cuticles matter more than color choice. Ragged or overtrimmed cuticles undercut a good polish job every time.
- It grows out slower than a French tip because there’s no hard line to chase. That’s most of the appeal.
“Quiet luxury nails” and “old money nails” are the same manicure with two names: short, glossy, and neutral, with nothing on it that asks for attention. This guide breaks down the exact shape, prep, and finish behind the look, plus where most people go wrong copying it at home. You’ll get the numbered steps, the point where sheer polish usually turns patchy instead of expensive, and three variations depending on your own nail length.
What are Quiet Luxury Nails?
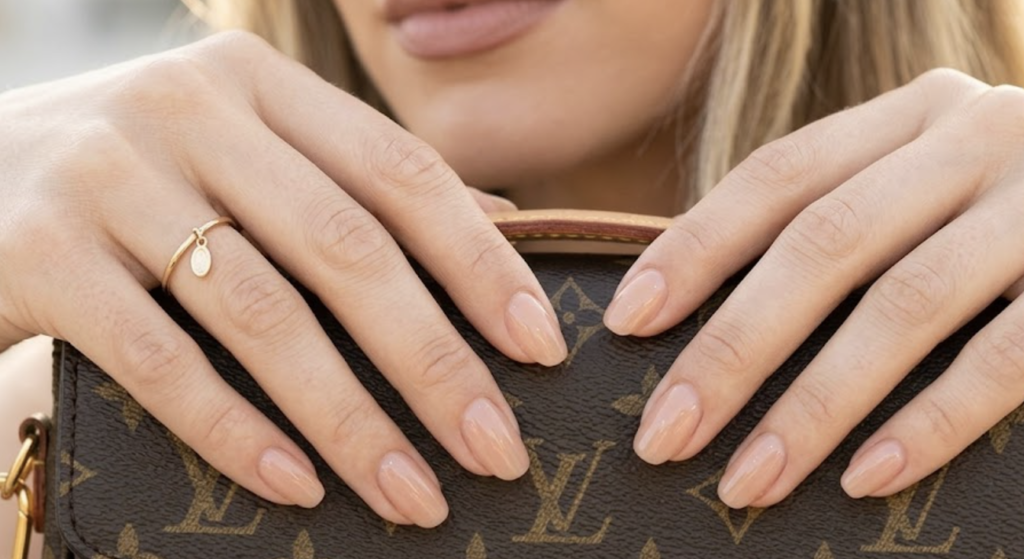
Quiet luxury nails, often called old money nails, are a short to medium manicure in sheer pink, milky white, or bare nude, filed into an almond or soft square, finished with a high-shine top coat and clean, closely groomed cuticles. There’s no art on them. The look depends on shape, prep, and shine, not color.
Best For
This look works on almost any nail length, which is part of why it’s stuck around. Here’s who it fits best and what to have on hand before you start:
- Nail length: Short to medium. No extensions required.
- Skill level: Beginner for polish, intermediate for gel or BIAB.
- Season: Year-round.
- Occasion: Daily wear, work, weddings, anything you don’t want to think about twice.
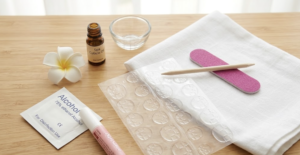
- Tools: Glass file, cuticle pusher, cuticle oil, ridge-filling or self-leveling base coat, sheer color, no-wipe glossy top coat, UV/LED lamp if you’re working in gel.
How to Get the Old Money Nail Design
The finished result is a bare, glassy hand that looks like it required nothing. Getting there is prep-heavy work with almost no forgiveness for shortcuts, so here’s the honest version, followed by the numbered steps.
Sheer polish shows everything underneath it. A ridge, a dry patch, an uneven cuticle line: all of it reads through a milky or nude finish in a way it never would under an opaque color. That’s not a flaw in the polish. That’s the trade you’re making for the look.
A salon does this exact set for around seventy dollars, mostly for the buffing you’re about to do yourself.
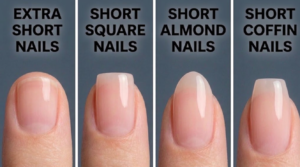
1. Shape it short to medium, almond or soft square.
File the free edge into a soft square or almond, whichever suits your nail bed. Round the corners on square shapes. This takes about five minutes for a full set.
2. Prep the cuticle without cutting it.
Push cuticles back with a wooden stick after softening them with oil or warm water. Lightly buff the shine off the nail plate so the base coat has something to grip. Don’t cut live skin. (See the mistakes section below for why.)
3. Lay down a ridge-filling or self-leveling base.
Apply one thin coat of a ridge-filling base coat, or a self-leveling gel base if you’re working in gel or BIAB. This is what makes the light reflect evenly instead of bumpy. Cure 60 seconds if using gel, or let regular polish set for two minutes.
4. Build the sheer color in thin coats.
Apply the sheer or milky color in two to three thin coats, letting each one dry or cure fully before the next. Thin coats build even color. One thick coat creates the streaking that ruins this specific look.
If it’s coming out patchy or streaky: your coats are too thick, or you’re not letting each one dry before the next. Thin it out. Two thin coats beat one heavy one every time.
If the color pools near the cuticle: you’re loading too much polish on the brush. Wipe one side of the brush against the bottle rim before each stroke.
If you can see brush strokes once it dries: the polish needs to warm up first. Roll the bottle between your palms before you start.
5. Seal it with a high-gloss, no-wipe top coat.
Apply a generous, even layer of top coat. If you’re working in gel, flip your hand over for a few seconds before curing so gravity levels the coat. Cure 60 to 90 seconds.
6. Oil the cuticles once everything’s cured.
Wash your hands, then work cuticle oil and a hand cream into the skin around the nail. This is the step that makes the whole set read finished instead of just painted.
Give this forty-five minutes to an hour the first time, working both hands. Twenty minutes once you’ve done it three or four times.
How the Look Shifts by Shape and Length
The core finish stays the same no matter what shape or length you’re starting from. What changes is which color reads best and how much prep each version needs.
Short Nails
Milky white or the barest pink read best here, since more nail bed shows per finger. Skip anything with shimmer. It reads costume, not quiet.
Almond
The shape most people picture when they hear “old money nails.” A soft nude or sheer rose works well without needing length to look intentional.
Soft Square
Slightly more formal. Pairs well with a deeper neutral, like light mocha or taupe, since a flat tip holds color a little more solidly than a rounded edge.
Press-On Version
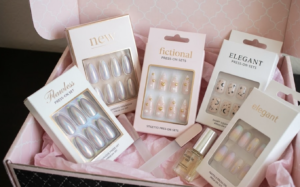
If you’ve redone the polish twice and it still streaks, that’s not a technique problem anymore. A pre-finished press-on set in the same milky or nude family skips steps two through five entirely and holds the shape for the full wear. Worth it if your hands are shaky or your schedule doesn’t have forty-five spare minutes twice a month.
Mistakes That Make This Manicure Look Cheap
Three mistakes account for most of the sets that miss the look entirely. Here’s what to check before you blame the polish.
If your nude looks chalky or flat: you picked an opaque cream instead of a sheer or jelly finish. Opaque nudes read like a bandage, not a manicure. Swap for a sheer or milky formula and build it in coats.
If your cuticles look raw or the skin around your nail is inflamed: you cut live tissue instead of pushing it back. The American Academy of Dermatology and the Mayo Clinic both advise against cutting cuticles at all, since it opens the skin to infection. Push back only, and trim hangnails, not the cuticle itself.
If the color shows a visible line at the base within a week: you skipped the ridge-filling base coat, or the top coat wasn’t capped at the free edge. Reseal the edge weekly with a fresh top coat layer, or plan on a full redo every two to three weeks with regular polish.
What’s Actually in This Kit
None of this requires a large kit. Here’s what does the actual work, by category, so you know what to look for regardless of brand.
- A ridge-filling or self-leveling base coat: the step most people skip, and the reason the finish looks glassy instead of bumpy.
- A sheer or jelly-finish color in nude, milky white, or soft pink: hold the bottle to light and check it looks translucent. Opaque won’t do this look.
- A true no-wipe, high-gloss top coat: matte or satin finishes work against the whole point.
- A glass or fine-grit file and a cuticle pusher: the shape and cuticle line carry more of the look than the color does.
- Cuticle oil, applied daily, not just on manicure day.
This page may include links to products we earn a small commission from if you buy through them. It doesn’t change the price you pay, and it doesn’t change which products we recommend.
FAQs
What’s the difference between quiet luxury nails and old money nails?
Nothing structural. They’re the same manicure under two names from the same TikTok cycle. “Old money” leans harder into the imagery (Park Avenue, tennis club); “quiet luxury” is the broader style term. The shape, finish, and color rules are identical.
What’s the best color for old money nails on darker skin tones?
Milky white, soft caramel, and rich mocha tend to show up better than pale pink sheers, which can look washed out on deeper skin. The underlying rule stays the same: sheer or jelly finish, never chalky opaque.
Can I get this look with regular polish instead of gel?
Yes. Use a ridge-filling base coat, two thin coats of a sheer or milky lacquer, and a glossy top coat, reapplied every two to three days to keep the shine. It won’t wear as long as gel, but the finish looks the same on day one.
How long does a quiet luxury manicure actually last?
Two to three weeks with gel or BIAB, since there’s no hard color line to grow out. Regular polish holds the color for about a week before it needs a top coat refresh.
Why does my sheer polish look patchy instead of smooth?
Almost always the coats are too thick, or you’re not letting each one dry before the next. Thin the application out and let it fully set between coats. The diagnostic notes in the tutorial above cover the other causes.
Do I need long nails for this to work?
No. Short and medium lengths are the more accurate version of this look, not a compromise version of it. Length was never the point.
Verdict: Worth it if you actually do the prep. Skip it if you’re not willing to touch a cuticle stick, because the shortcuts show more on this manicure than on almost any other.
Sources & References
- Mirellé, “Old Money Nails: Classic Colours & Almond Shapes” — May 2026
- The Everygirl, “Old Money Nails” — June 2025
- NewBeauty, “Old Money Nails Make Wealth Look Natural” — September 2024
- Lots of Lacquer, “How To Keep Sheer Polish From Streaking” — April 2026