
Key Takeaways
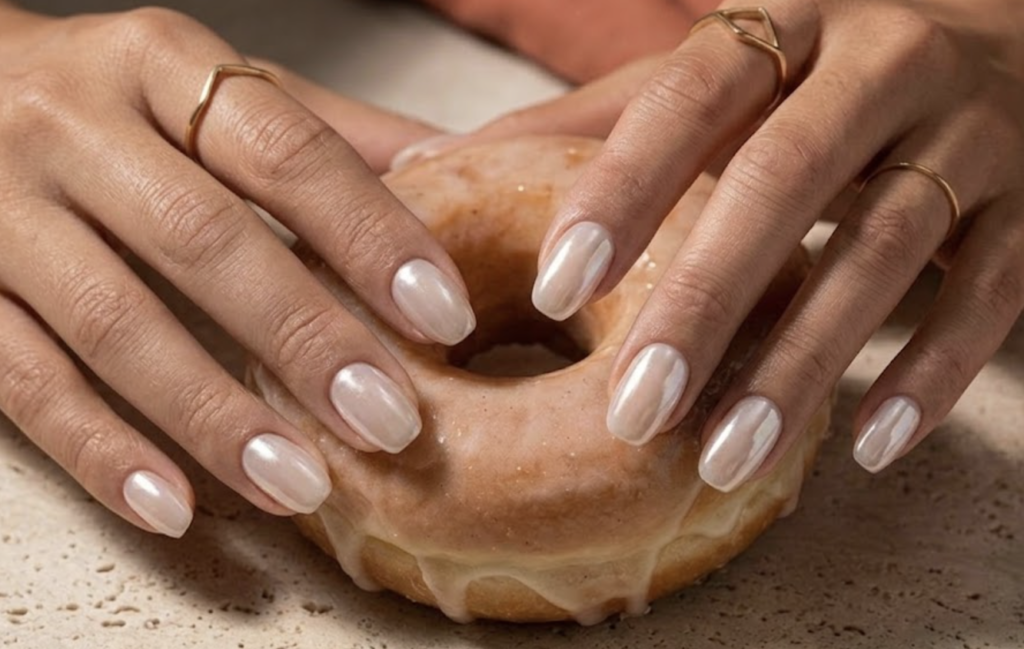
Glazed donut nails are a chrome finish, not a polish color, and that changes how you build them. Here’s what actually matters before you start.
- The finish is chrome powder pressed into a tacky top coat, not a bottled polish shade.
- Plan for 45 to 60 minutes the first time you do a full set.
- Most patchy results trace back to one thing: the top coat wasn’t left tacky enough.
- Mixing brands across your gel base, top coat, and powder is normal for this technique.
- No UV lamp at home? A press-on version gets you the same finish without the gel steps.
Glazed donut nails are the sheer, pearly finish that made Hailey Bieber’s manicurist famous back in 2022. Four years later, it’s still one of the most requested looks in the chrome category. A salon does this finish for about $85, mostly to get precision on the one tricky step.
What are Glazed donut nails?
Glazed donut nails start with a sheer or nude gel base, topped with a tacky no-wipe top coat. Fine white or pearl chrome powder presses into that tacky layer, then gets sealed with a final coat. A full build plus glaze runs close to an hour the first time. The glaze step is where most home attempts turn patchy.
Best For:
This technique works on any nail length, but it asks for some gel experience before you add the glaze. Here’s who it fits best right now.
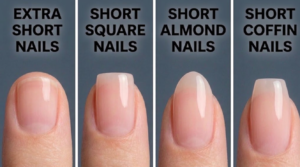
- Nail length: any length. A short, softly squared shape is one of the most requested pairings with this finish right now.
- Skill level: intermediate. If you’ve never worked with builder gel, build a plain set first and add chrome on the next one.
- Season or occasion: no season attached to this one. It shows up for weddings, graduations, and any week you want your hands to look considered.
- Tools required: a UV or LED lamp, builder gel, a no-wipe top coat, chrome or glaze powder, a fine liner brush, and a sponge or silicone powder applicator.
How to make glazed donut nail design at home?
This is a two-part build: the structural gel set, then the glaze on top. Skipping ahead to the glaze before the base is fully cured is the fastest way to lose the whole set.
What you’ll need
- Builder gel (BIAB) in a sheer or nude shade
- A no-wipe, tacky-finish top coat
- Fine white or pearl chrome powder
- A sponge or silicone powder applicator, not a brush
- A fine liner brush for sidewall control
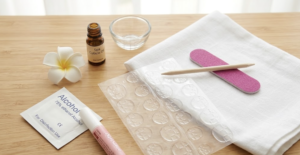
- 90 percent isopropyl alcohol for prep
- A UV or LED lamp
- Prep and dehydrate. Push back the cuticle, buff the shine off the nail plate, and wipe every nail with alcohol. Skip this and nothing after it holds.
- Build the base. Apply the builder gel thin, one nail at a time, and cure fully, about two minutes per hand. Don’t rush this layer to get to the glaze.
- Apply color, if you’re using one, and cure it fully before moving on.
- Apply the top coat. This is the layer that has to stay tacky, not go fully hard, so cure it to the exact time on the bottle. Cap the free edge so the glaze has a clean edge to sit inside.
- Press in the chrome powder. Use a sponge or silicone tip, not a brush. Work the sidewalls and cuticle line first, since those are the spots that go patchy.
If it’s not taking: Powder looking dusty and won’t grip? Your top coat cured too hard. It needs to stay tacky, not fully set, for the powder to catch. Looks like glitter instead of a mirror? The sticky layer wasn’t removed the right way, or you used a brush instead of a sponge. Switch tools. Patchy only at the sidewalls? That edge needs more pressure than the center of the nail does. - Seal it. One more thin top coat over the powder, cured fully, and you’re done.
Check the tips around day three or four. If you see wear starting there, a very thin extra top coat at that edge buys you another week.
Design Variations
The base technique doesn’t change. The base color does. Here are the versions worth knowing before you pick one.
- Vanilla glaze: sheer white base, the original version of this look.
- Strawberry glaze: soft pink base, warmer in daylight.
- Glazed square: a short, softly squared shape paired with this finish, one of the most requested combinations right now.
- Chrome French hybrid: chrome only at the tip, glaze underneath.
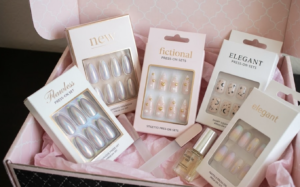
- No-lamp version: the same finish on a press-on set, no gel steps required.
Mistakes to Avoid
Almost every patchy set traces back to one of four moments. Here’s where to slow down.
- If you’re tempted to cure the top coat a little longer “to be safe,” don’t. That single habit causes most of the patchiness in this technique.
- If you reach for a brush to apply the powder, put it down. A brush disturbs the tacky layer instead of pressing evenly into it.
- If you’re rushing past the sidewalls to save time, go back. That’s the first place a patchy set shows.
- If your nails feel even slightly oily going in, dehydrate again before you build. Nothing later in the process corrects that.
Product & Tool Notes
You need five things for this set, and none of them have to be from the same brand. Here’s what each one is doing.
- A no-wipe, tacky-finish top coat. This is the layer the chrome grips, so what it’s designed to do matters more than the brand name on the bottle.
- Fine, microfine chrome or glaze powder. If it looks chunky or sparkly in the jar, it’s glitter, not chrome, and it won’t give you the mirror finish.
- A sponge or silicone powder applicator. Skip the brush here.
- A fine liner brush, for keeping the gel bead controlled along the sidewalls during the base build.
- 90 percent isopropyl alcohol, for prep.
This post contains affiliate links. If you buy through one, NailDesigns.com may earn a small commission at no extra cost to you.
FAQs
Is chrome powder the same thing as glazed donut nails? Not exactly. Chrome and glazed donut nails use the same base technique, pressing pigment into a tacky top coat. Glazed donut nails use a lighter hand and a finer, pearl-leaning powder, so the finish glows instead of mirrors.
How long does a full glazed set take at home? Plan for 45 to 60 minutes your first time. Once you’ve done the sequence a few times, it drops closer to 30.
Why did my chrome come out patchy? Almost always, the top coat cured too hard before the powder went on. It needs to stay tacky, not fully set, or the powder has nothing to grip.
Can I mix brands for the base gel, top coat, and powder? Yes. Mixing brands across these three products is normal for this technique. The one thing that matters is using a top coat actually designed to stay tacky, whatever brand it is.
How long does a glazed set last before it needs redoing? Most wear shows up at the tips first, sometimes within a few days if the top coat wasn’t quite tacky enough. A full set typically holds two to three weeks with normal wear.
Can I get this look without a UV lamp? Yes. The same finish is available as a press-on set, so you get the glaze without any of the gel steps.
Sources & References
- SalonGeek practitioner forum, chrome application troubleshooting threads (2016 to 2020)
- Marie Claire, “Chrome Nails Remain the Ultimate Fashion-Girl Manicure,” June 2026
- NAILSAMI, “Chrome vs Glazed Donut Nails: What’s the Real Difference?” March 2026
Author
Nora Vance writes NailDesigns.com from Kansas City. She tests every set on her own hands before it goes on the page.
Updated: July 14, 2026