
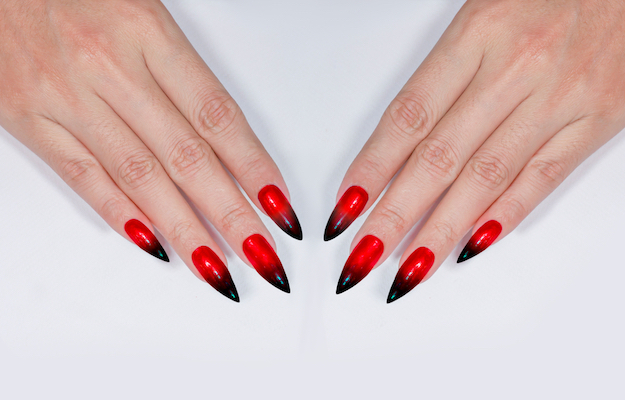
Halloween nail art will never be complete without the ones that creep you out for days. In this post, I’ll share a tutorial on how to create a glow in the dark design perfect for trick or treat.
Easy Glow In The Dark Halloween Nail Art
I know you lovelies were so thrilled with the cute Halloween nail art I curated a few days back. After all, they’re all dainty and cute, and you can wear them anytime, anywhere. However, it wouldn’t be Halloween without donning a design that’s mysterious and unnerving. While the design is quite complicated, it’s still very much doable. Just unearth your creative juices, and everything will fall into place.
For this Halloween nail art tutorial, you will need the following materials:
- Base coat
- White nail polish
- Coral jelly nail polish
- Dark yellow nail polish
- Glow in the dark top coat
- Black nail polish
- Top coat
- Detail brush
- Sponge
Step 1: Apply Base Coat
Begin your Halloween nail art by applying a base coat. As you’ve read in my tutorials, I couldn’t emphasize enough just how important this is. It’s fantastic to have great nail designs, but everything is just not worth it if you don’t take care of your nails.
Step 2: Place White Nail Polish
White nail polish is the perfect canvass for this nail art. It’s easy to work with plus it helps the other colors pop out. Apply two coats of white nail polish on all of your fingers. You may add another layer if the color is not white enough for you.
Step 3: Create Gradient Color
The primary color for this Halloween nail art is a gradient mix of coral jelly and dark yellow nail polish. To create this, apply several coats of coral jelly nail polish with a sponge. Just below it, apply several coats of dark yellow nail polish as well.
Step 4: Sponge On Nails
Once done with applying the nail polish on the sponge, take the sponge and dab it on your fingernails. Do this a couple of times on each nail. Make sure that the colors pop out for a beautiful nail art.
Step 5: Clean Cuticles
Dabbing the sponge on the nails may leave a mess on your fingers. So, clean it all up using a cotton bud soaked in acetone. Clean the cuticles well as messy nails are extremely unsightly.
Step 6: Apply Glow In The Dark Top Coat
It’s now time to begin working on the magic. Apply the glow in the dark top coat on your nails. Let it rest and dry for a while. Once you’re sure the first coat is already dry, apply another coat. Let it dry again.
Step 7: Create A Haunted Tree
On your index finger, draw an evil tree using the acrylic paint diluted with a little bit of water. With the evil tree finally taking form, adjust its branches. Extend some of it all the way to the right portion of the nail. The others may slightly extend to the same direction.
Step 8: Draw Grasses
Detailing the drawing doesn’t end with the trees. Add more interest to this Halloween nail art by drawing grasses. This is a free form. You can just place grasses of different height and thickness.
Step 9: Draw Bats
A Halloween nail art would, of course, not be complete without the iconic bats. For this design, add two just on top of the grasses. Both drawings need not have the same size.
Step 10: Draw Grassed On Middle Finger
Head on to the middle finger for your next design. Begin the nail art by drawing grasses. Completely cover the top part of the nail with the drawing.
Step 11: Extend Branches
Since this nail art is aiming for continuity from one nail to the other, extend the main branch of the evil tree to the middle finger. Check the animation above for your guide. Again, the drawing need not be perfect.
Step 12: Make Pumpkin
Add details to this drawing by adding a pumpkin. Begin with creating an outline of how you would like the pumpkin to look like. Then, fill in the spaces. The pumpkin should look like it’s hanging from the branch. Then add teeth to the drawing.
Step 13: Make A Hill On The Ring Finger
Move on to the ring finger. On this nail, draw a distant hill. The drawing should be placed on the rightmost corner of the nail.
Step 14: Draw A Haunted House
On top of the hill, draw a haunted house. You can begin the process by outlining first. Then, zoom into the details such as creating door and windows.
Step 15: Extend The Branches And Grasses
For continuity of this Halloween nail art, extend the drawing of the branch. There should also be grasses just below the hill. These will give cohesiveness to the entire design.
Step 16: Add A Flying Bat
Just like the index finger, draw another bat on this nail. This time though, you only need to add one bat. Don’t fret if this drawing is not similar to the other bats you’ve already made. They do not have to look the same.
Step 17: Make A Moon
Add a moon to the design on this finger. Create this by mixing white and yellow nail polish. You can just draw a small moon on the left corner of the ringer fingernail.
Step 18: Finish The Branches
Finally, the Halloween nail art has reached your pinky fingernail. On this, draw the extended branches. The design does not have to be similar with the other branches drawn on the other nails. They just need to be cohesive.
Step 19: Add A Cute Scared Cat
The design on your pinky fingernail is quite different from the other nails. Here, you add a cute scared cat. Watch the illustration above on how to create the figure.
Step 20: Draw Some More Grasses
Again, we draw some grasses on this design. Add the drawing just below the cat.
Step 21: Draw Branches On The Thumb Nail
This is the last nail we’re placing a design on. For the thumb, create some more branches. However, unlike the other nails, the extension of the branches here is going to the leftmost corner.
Step 22: Make More Grasses
As repetitive as this may sound, you have to draw grasses again. I couldn’t emphasize much more how important doing this is in giving this Halloween nail the cohesiveness it needs. Create both long and short kinds of grass to add dimension to the design.
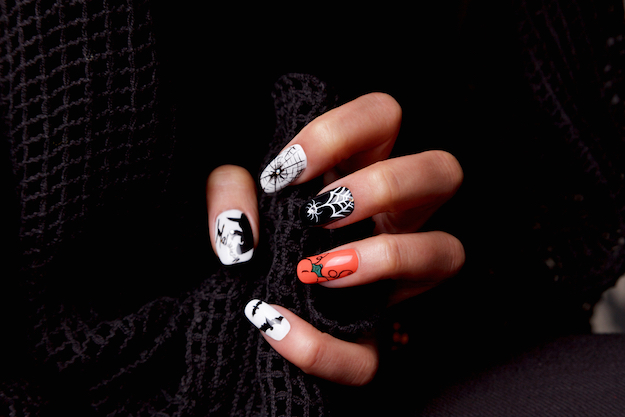
Step 23: Add A Web And Spider
Other prominent figures for Halloween nail art are the spider and its web. Being so, add them to this design. Draw a spider and its web, and have them hang from the branches.
Step 24: Finish With A Top Coat
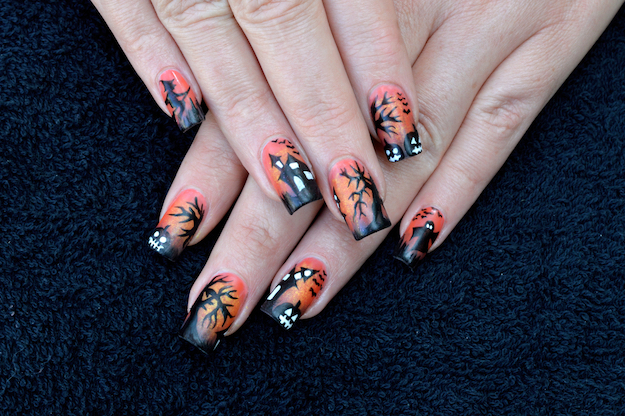
Finally, apply the top coat to the Halloween nail art. This protects the artistry you’ve just made. It also gives the design a glossy finish.
Here’s what the nail art looks like in the dark:
Are you so excited to try this out? No worries, I feel you!
For a detailed step by step guide on this Halloween nail art, watch this video from LeUnghieDiAngela:
Halloween nail art is one of the most interesting occasional nail designs you can create. If you think this is quite difficult to follow, that’s not true. Go ahead and pick up those materials so you can find out for yourself.
Push yourself to recreate this nail design. It looks complex, but it’s easy to replicate. For more Halloween nail art design, check this post!
Follow us on Facebook, Pinterest, Twitter, and Instagram.
Editor’s Note: This post was originally published on October 2016 and has been updated for quality and relevancy.