
Nail shape trends have evolved in so many ways for the past years. From the more conservative and dainty round or oval tips to the more adventurous stiletto or edge, there are plenty of cool nail shapes for everyone.
But have you ever tried lipstick shaped nails? If your answer is no but you’ve always been curious to try it out for yourself, then this is your sign that you should finally give it a go!
In this article, we show you how to achieve fabulous lipstick shape nails that will accentuate your hands beautifully even when you’re indoors!
RELATED: 6 Different Nail Shapes Perfect For Your Nail Design [INFOGRAPHIC]
Here’s a Super Easy Lipstick Shaped Nail Tutorial for You!
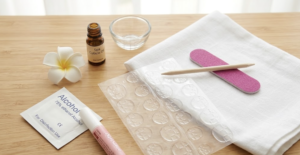
What You’ll Need:
- Cuticle stick
- Cuticle bit
- Acetone
- Nail Primer
- Nail Form
- Acrylic powder
- Acrylic liquid
- Acrylic nail brush
- Buffer
- Nail file
- Clear top coat
Step 1: Prime Your Nails
[instagram url=https://www.instagram.com/p/BkA3-JghnC_/ hidecaption=true width=800]
The preparation of your nails is incredibly important when applying acrylic. Regardless of whatever new nail shape you’re about to have, you don’t want your acrylic extension to lift and create an unsightly look.
You have to clean your nails and push down the cuticle using a cuticle stick. After that, you need to wipe it down with acetone, this is to ensure that no oils are present on the surface of your nails.
Oil might cause lifting of your acrylic, so it is important that your nails are free of it. Use a cuticle bit to smoothen and buff your nail surface and finish off with some clear nail primer.
Whatever lipstick nail designs you come up with will surely look great if you make sure that you prep your nails properly so this step is definitely crucial.
Step 2: Place Your Nail Form
Next up in your journey to achieving a lipstick nail shape, is placing your nail form. Nail form is very important to achieve a uniform shape with your acrylics.
Nail technicians swear by these as these malleable forms ensure that you have great acrylic nails every time. No uneven nails here!
Step 3: Time for Acrylics!
Once you’ve put your nail form on for your guide, then it is time to place your acrylics for lipstick shaped nails! Dip your acrylic nail brush onto your acrylic liquid and dip it next in acrylic powder.
Hold your brush for three seconds and pick up the powder. Put it directly onto your nail with the nail form underneath it, and begin shaping.
Step 4: Flatten Your Lipstick Shaped Nails
One of the steps that you have to do to achieve lipstick nails is to flatten your acrylic paste onto your nail. You have to make sure that it is at the same level as your actual nail and you can do this with the help of your acrylic brush.
Push it down and keep brushing it until smooth. Flattening it out is very important because you really don’t want any bumps on your acrylics.
After all, you’re making the acrylics look like your actual nails, and having bumps in the transition line pretty much gives them away.
RELATED: Round Nails Tutorial | 3 Easy Steps To Get This Classic Nail Shape
Step 5: Create a One-Sided Slant
Now it’s time to shape your acrylics! A lipstick nail shape is a very distinct design that a lot of people have mixed feelings about.
But if you’re adventurous and have a steady hand, then creating lipstick shaped nails should be easy-peasy for you!
Create a one-sided slant using your brush and make sure to brush your whole nail after every shaping motion. This is to prevent your acrylics from having an uneven bump because of all the pushing brought about by shaping.
Step 6: Don’t Forget the Other Side!
Because you’re shaping one side of your nail, that means some of the malleable acrylic paste might be shifted to the other side. Don’t forget to pay attention to the other side too!
Again using your brush, shape the other side of the nail and create a line that’s adjacent to the slant on the other side of your nail. When you’re happy with the line, go back on your slanted side and clean up any rough edges or sides.
Step 7: Pat Everything Down
Pat your acrylic down with your brush and make sure that there are no large bumps or any transition marks between the actual nail and the acrylics.
Depending on your acrylic liquid, your acrylic paste dries very very fast, so you need to ensure that everything is smooth when you applied and shaped them using your brush.
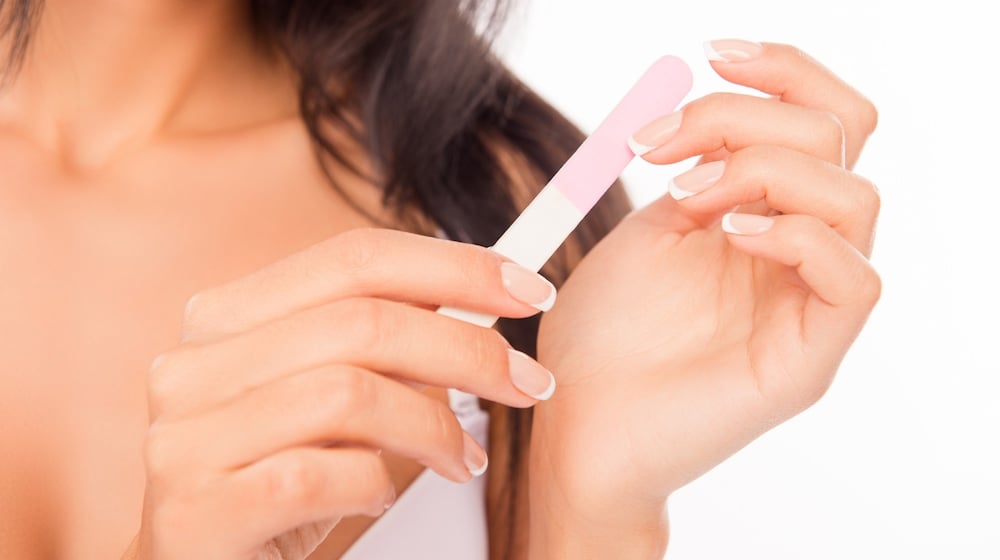
Step 8: File the Edges
Remove your nail form and file the edges of your lipstick shaped nails. If you want a more rounded edge, you can totally do that!
All you have to do to achieve a rounded edge is to run your nail file along the sharp tip repeatedly until you get the desired roundness.
It’s better to run your nail file along your acrylics one by one as there have been plenty of times when people would mistakenly file their nails too short due to aggressive filing. You can’t have that filed piece back, so better be careful with it in the first place.
Step 9: Final Touches
Of course, you can’t forget about buffing the top of your new lipstick shaped nails! This step is done to ensure that your nails are smooth and no traces of the transition line between your actual nails and the acrylics are seen.
When you’re done buffing it, wipe your nails and coat it with your clear top coat.
See how NAILS Magazine does lipstick shape nails in this video:
And there you have it! Beautiful lipstick shaped nails that will last you weeks. You can choose to go plain with the clear top coat, or take your design a step further by creating fun nail art.
After all, having an exciting nail shape calls for fun and funky nail art too!
What do you think of these fun lipstick shaped nails? Comment down below!
Up Next:
- DIY Stiletto Nails | Get A Perfectly Sculpted Nail Shape
- Acrylic Nail Kit For Beginners | Everything You Need To Know
- Long Fingernails Hacks For People Having A Hard Time Doing Chores
Are you as passionate as we are about nail art, health, and trends? Then WRITE FOR US! Share your nail-guru thoughts to the world.