
Last Updated: July 2026
French ombre nails, also called baby boomer nails, blend a white or sheer base into a second shade so the color fades instead of stopping in a hard line. You build it with a makeup sponge, not a brush. A first attempt takes about 25 minutes. It works on natural nails, gel, acrylic, or press-ons, and it holds for one to two weeks depending on the base.
Key Takeaways
- You’ll learn what French ombre actually means, how the gradient gets built, how long it takes on a real hand, and where it tends to go wrong. Ten design variations are included, from short nails to press-on.
- White base plus a second polish, usually a soft neutral or pastel, sponged in two to three light layers.
- First attempt: about 25 minutes. Third attempt: closer to twelve.
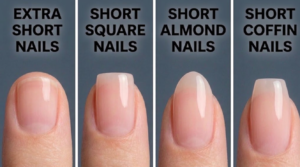
- Works on any nail length. Short square holds the gradient just as well as long almond.
- The most common failure is a hard line instead of a fade, which comes from too much polish on the sponge, not bad technique.
French ombre nails are classic nail design and versatile. These “baby boomer nails” can suit anyone’s style.
If you want to impress the glam squad with these fabulous gradient nails, here are some of the cutest ways to slay this new trend and how you can recreate them!
RELATED: 15 Ways To Wear The Big Milky White Nails Trend
Best For:
- Nail length: any. Short and square shows the gradient cleanly because there’s less surface for it to blur.
- Skill level: beginner-friendly with the sponge method. The freehand chrome and marble variations below are intermediate.
- Season: works year-round. Warmer neutrals read fall, pastels read spring.
- Tools: a makeup sponge (a cut kitchen sponge works), a base coat, two polish colors, a clear top coat.
11 Ways To Rock the French Ombre Nails Trend
1. Hint of Shine
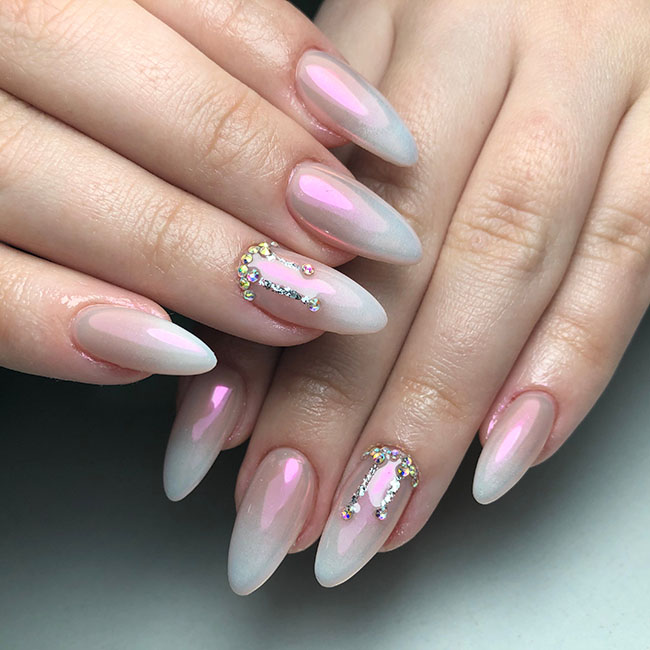
Sometimes, your nail art deserves a dash of sparkle for a cute twist! Even one or two of the tiniest jewels can make your French ombre nails stand out even more.
How to DIY: To ensure that the gems stick, it is better to work on this with acrylic nails. Using an orangewood stick, apply the jewels at the bottom of your ring fingernail. If you want to add more, you can follow our rhinestone nail art tutorial!
2. Stiletto Style
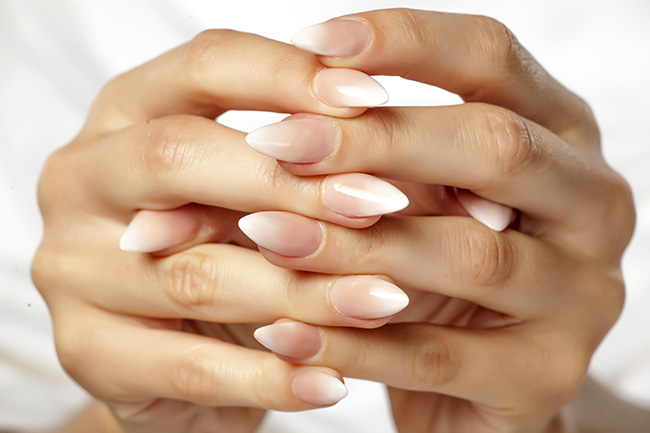
Stiletto nails are everyday favorites among the glam squad, and it’s easy to see why. The stylish cut makes the perfect canvas for any kind of nail design! They might be sharp, but they’re super sexy too!
How to DIY: To successfully sculpt the shape with an acrylic nail kit, check out our DIY stiletto nail tutorial! Not too sure if you can do it? You can also use plastic nails or stick-on.
3. Sprinkle of Glitter
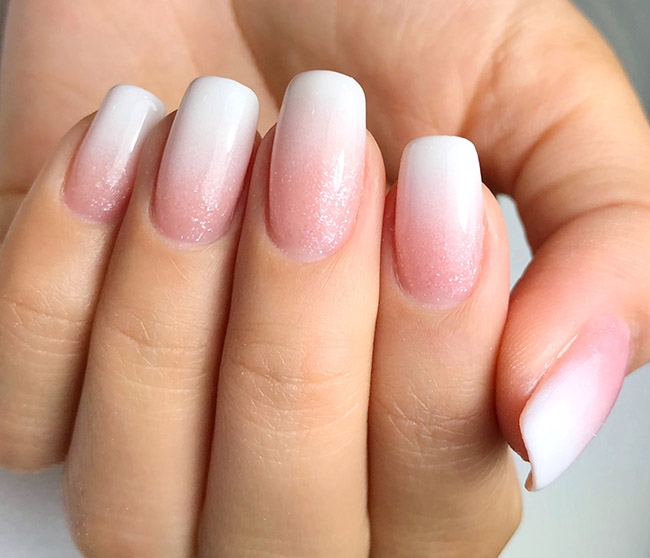
If you’re the type of gal who likes to rock glittery nails, you can never go wrong with this twinkling nail design. Who knew a few specks of glitter can make such a shiny difference?
How to DIY: While your clear topcoat is still wet, sprinkle some glitter powder over your nails. You can also try to recreate this falling glitter nail art if you want more sparkle!
4. Everything Sparkly
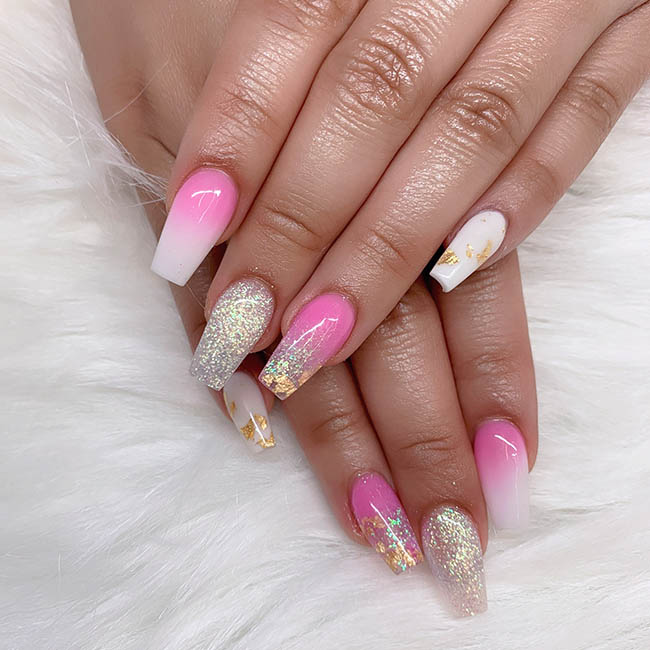
My love for flashy nail designs never ends. Even if I’m wearing neutral lacquer, sparkly ornaments just tickle my fancy!
How to DIY: Apart from incorporating shiny nail stickers and glitters, don’t skimp on the gems! If you can’t decide on the style or patterns, you might like our picks for bling nail designs. Acrylic nails are the best bases to use for this process.
5. French Vanilla
Is it just me, or are the creamy swirls in iced coffee just so satisfying to look at? Thankfully, they’re just as aesthetically pleasing when recreated as a nail design!
How to DIY: Since you should always start with a white base, choose a coffee-like shade for the other color. If you need more inspo, we have some milky white nail designs you might like!
RELATED: 3 Home Remedies for Dry Cuticles
6. Chrome Chic
Looking for something more than just sheen for your mani? A chrome effect can definitely be achieved without compromising the look of your French ombre nails!
How to DIY: After applying the base coat and gradient color, use a clear topcoat and cure the gel under a UV light. Then, apply a tiny amount of loose chrome powder. To make sure you do a clean job, you can use our mirror chrome design as a reference!
7. Dainty Daisy
Daisies have become super trendy in fashion and nail art! This cute little flower adds a fresher flair, especially when paired with French ombre nails. The hues also complement the natural color palette of your nail canvas.
How to DIY: If you’re confident with your painting skills, you can try our daisy nail design! Decals can work, too. Don’t forget to add a few gems for a chic finish.
8. Nature’s Touch
Bring out the earth tones of your gradient nail designs with nature-inspired embellishments! A pretty vine or fern can make the colors pop. Any kind of leaf will do, as long as it fits your aesthetic.
How to DIY: Before applying the clear topcoat, use white nail polish to paint the leaf shapes. You can also use nail decals for the leaves, or you can follow our palm tree nail tutorial for more options. Shellac nails are good choices for this specific nail art.
9. Classic Ombre
The iconic French ombre nails are often created with a beautiful gradient of white and neutral colors. The clean look offers an elegant appeal that never goes out of style!
How to DIY: Apply a white base coat and let dry. Use a sponge for your second color to create a cool gradient effect. For the step-by-step process, you can check out our ombre nails tutorial!
10. Floral Flair
Everybody loves floral nail designs, especially when they’re adorned with chic 3D embellishments! Make your gradient nails dreamier than ever with the beauty of petals.
How to DIY: Create your own flowers using an acrylic nail kit! You will also need some nail art brushes to control the shape of the petals. Our 3D acrylic rose tutorial can help you get started.
11. Dreamy Marble
As if your French ombre nails weren’t cute enough, adding marble accents can kick them up a notch! This mesmerizing nail art will fulfill your aesthetic dreams.
How to DIY: Choose two nails per hand where you will apply the marbling gradient. Add droplets of your chosen colors to form the effect. You can find out more about the complete process with our marble nail art guide!
French ombre nails offer a classy and glamorous look that you can rock for any occasion. You should definitely consider them as one of your go-to manis!
They’re also very easy to do by yourself, provided that you already have a design in mind. It’s also important that you have the right nail kits and nail polishes to achieve your preferred finish.
Product and Tool Notes
A cut makeup sponge does the job. If you’d rather not deal with cutting one, a set of pre-cut ombre sponges saves a step. For the chrome variation, you need a cured gel top coat and a chrome powder made for nails, not a craft-store mica.
This section may include affiliate links. If you buy through them, we may earn a commission at no extra cost to you.
What’s the Verdict?
Worth doing at home. It’s a sponge technique, not a painting skill, and the fade forgives more than a straight line ever will. Skip the marble variation on all ten nails your first time out. Do one hand, see if you like it, then commit.
Inspired to rock more designs for your french ombre nails? Check out this video by Cute Polish for more nail art ideas:
Which of these french ombre nails would you love to recreate by yourself? Share your picks and favorites in the comments section below!
FAQs
How long do French ombre nails last? One to two weeks with regular polish, two to three weeks with gel, depending on how much your hands are in water or gripping things.
Do I need acrylics to do French ombre nails? No. The gradient works on natural nails, gel, or press-ons. Acrylic just gives you a longer or more sculpted base to work with.
Why does my gradient look like a hard line instead of a fade? Too much polish on the sponge in one pass. Blot the sponge on a paper towel before each press, and build the color in thin layers.
Can I do this without a UV lamp? Yes, with regular polish. You’ll need one if you’re using gel, which is the more durable option.
What’s the difference between French ombre and baby boomer nails? Nothing. Baby boomer is the older name for the same white-to-neutral gradient.
Is this cheaper than getting it done at a salon? A gradient set runs about $65 to $85 in a chair, mostly for the sculpting and the chrome step if you add it. At home you’re paying for polish and a sponge you already might have.
Sources and References
Medscape, on at-home gel application and skin sensitization risk when product touches uncured
NAILS Magazine, on cure chemistry and why a gel that looks hard isn’t always fully cured
Scratch Magazine, on lifting caused by base coat and surface prep, not just product choice